The Web Control Panel (in short, WCP) is a utility that runs on the UDOO NEO. It is designed to:
- easily configure your NEO;
- check its connection status;
- learn how to develop basic projects;
- test simple Arduino sketches on the fly;
- browse the documentation;
- manage the connection to the cloud.
To use the WCP you need to connect to the NEO through a web browser. Follow the instructions provided in 2.3 to prepare the NEO as a headless device and obtain its IP address.
Once the NEO is ready, open your browser and type the IP address of the NEO in the address bar. You should see the login dialogue of the Neo (this may not be shown if using the preloaded version of Udoobuntu). Insert the credentials (the default credentials are “udooer” for both user and password). The WCP should appear in your browser window.
The following picture shows the main page of the WBC provided on UDOObuntu version 2.2.0. A slightly different interface may appear for different versions of UDOObuntu. This view is known as Dasboard.
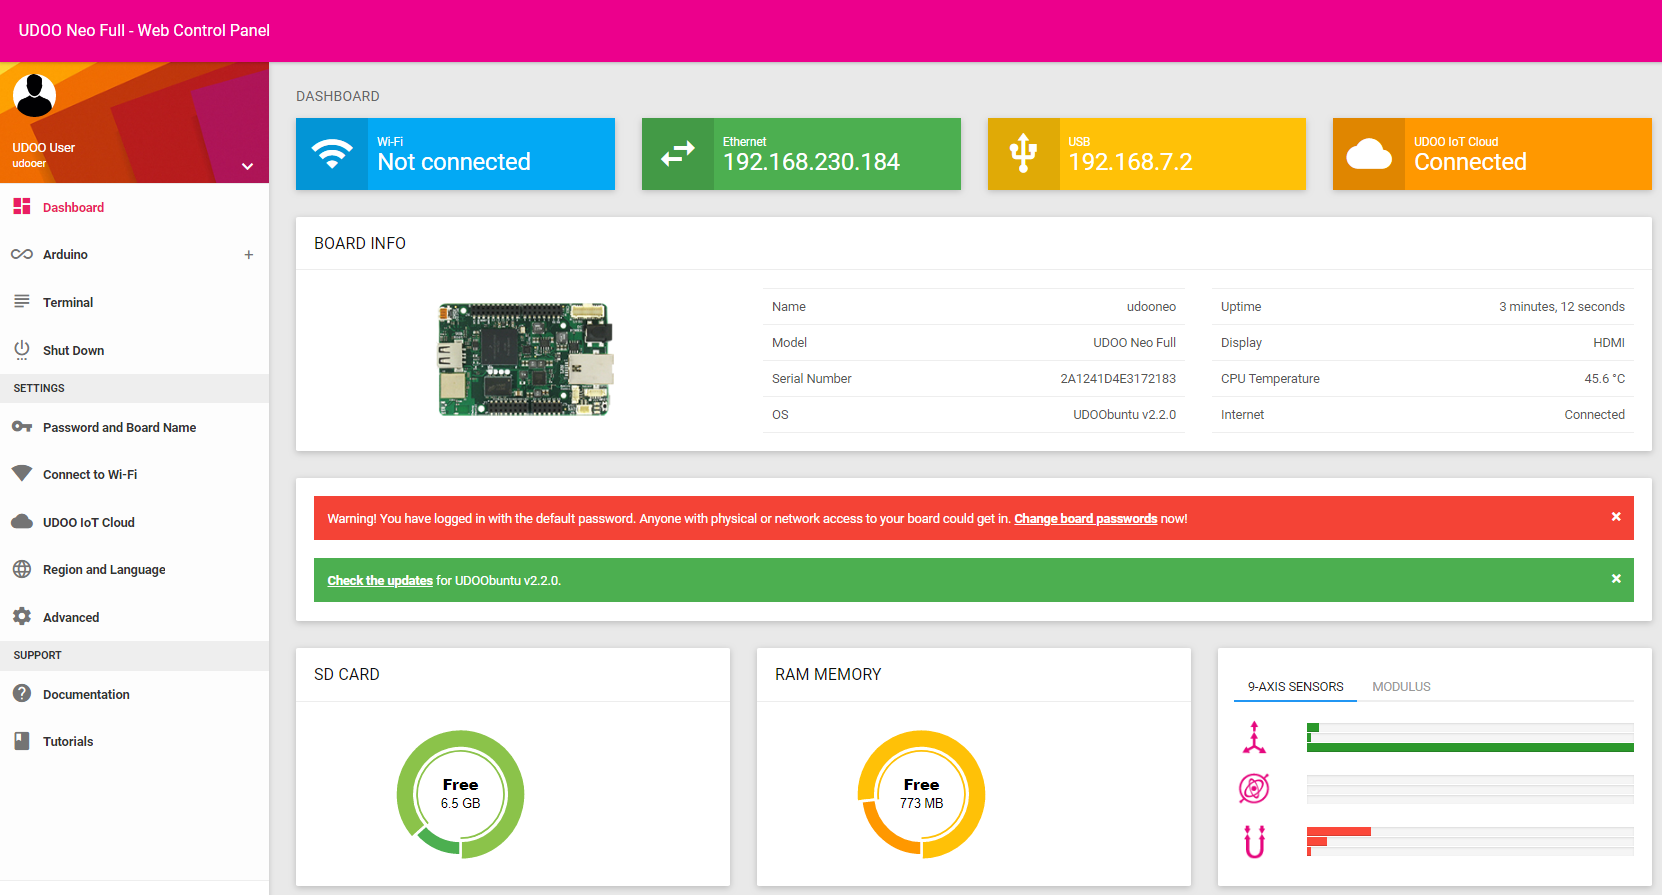
The Dashboard gives you a quick insight on the status of your UDOO Neo. At the top, you can find an overview of the connectivity, indicating whether Wi-Fi, Ethernet, USB, and the IoT Cloud are connected. If active, the IP address on each interface is also reported. In the central area, you can find some data about the board: model, name, serial number, and status informations (for example the temperature of the processor). If you have not changed the default credentials, you will notice a warning in orange/red colour suggesting you to do so. Status and warning messages appear on this part of the dashboard. Finally, on the bottom, a few boxes shows the free space in the memory and SD card, and the axis and modulus values for the accelerometer, gyroscope and magnetometer sensors.
On the left side of the screen you should see the menu with all the possible actions that can be performed from the WCP. In detail:
- Arduino, which is made of some sub-menus:
- Web Editor is a simplified Arduino IDE, described in 2.5.1.
- Ardublockly is a tool for programming the Arduino emulator of the NEO through a visual environment, where each action is represented with blocks. This allows you to build Arduino sketches graphically, interconnecting logic blocks, without writing any code. For more information on Ardublockly please see: https://github.com/carlosperate/ardublockly
- App Inventor is a tool for creating Android applications that can control and interact with the UDOO NEO. Follow the instructions provided in the menu to setup your board and development environment.
- Terminal: it opens a console where textual commands can be sent to the NEO; this is generally for advanced users, at it requires some basic knowledge of the Linux shell.
- Settings: this section helps you to configure your board and connect it to a wireless network. For example:
- Password and board name: allows you to change your passwords and set a name for your board.
- Connect to Wi-Fi: allows you to select and configure the connection to a Wi-Fi network.
- UDOO IoT Cloud: allows you to setup your board in order to integrate with the Cloud services provided by UDOO.
- Regional settings allows you to set the locale, time zone and regional settings;
- Advanced settings are for experienced users; you can change the main video output device (e.g. HDMI or LVDS), enable/disable the Arduino core, change the TCP port where the Web Control Panel operates (so that you can, for example, install a web server on your board, like Apache or nginx);