The Arduino IDE is available both when the NEO is used as a headless PC and as a desktop PC. In the first case, you can start the IDE from the menu on the left side, as illustrated in the figure below:
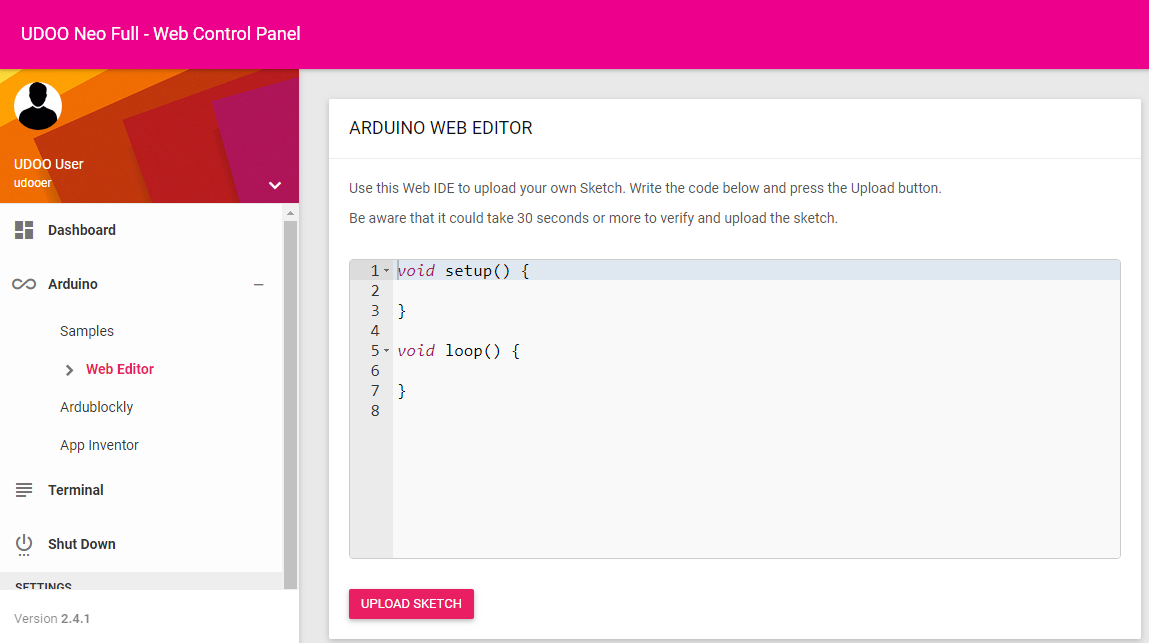
lease notice that the Arduino editor available through the web interface of the headless NEO (called Arduino Web Editor) is a simplified version of the full Arduino IDE. It allows you to just write a sketch and upload it to the Arduino core, but it lacks all the other features of the standard Arduino IDE.
When running the NEO as a desktop PC, wait for the Udoobuntu desktop to appear, then select:
Start → Programming → Arduino IDE
This will open the Arduino IDE environment.
To test it, just perform the following steps:
- Select: File → Examples → Basics → Blink
- Click on "Upload" button.
- Wait "Compiling sketch..." until "Upload is complete".
- Now the sketch will be run on the Cortex M4 side, and the led on the UDOO board will blink every 1 second.
The same test is also available for the Arduino Web Editor. Select Samples from the left-side menu, then click the “Run” button on the Blink panel. Note that you do not need to physically connect any led on pin 13, since this pin is already connected (through a hardware wire) to the red led of the NEO.